Are you ready to transition your nails into the rich, warm tones of autumn? This season, fall nail designs are all about embracing cozy aesthetics with a chic twist. But what makes a nail design quintessentially “fall,” and how can you achieve these trendy looks at home? From the comforts of classic shades to the boldness of modern art, we’ll explore stunning nail designs that are perfect for 2024. Whether you’re a fan of minimalist styles or elaborate artistry, get ready to meet your new favorite manicures for the cooler months!
Autumn Leaf Decals

These nails are a celebration of fall’s vibrant palette, with clear jelly nails serving as the perfect backdrop for delicate golden leaf decals. This design is both festive and sophisticated, offering a brilliant way to wear the season’s traditional colors in a modern style.
Consumables List
- Clear jelly nail polish.
- Gold leaf decals.
- Nail adhesive for secure decal placement.
- Long-lasting top coat for a seamless finish.
DIY Instructions
- Apply a layer of clear jelly nail polish as the base.
- Place gold leaf decals carefully on the nails while the polish is still slightly tacky.
- Secure the decals with a thin layer of nail adhesive if needed.
- Finish with a top coat to protect the design and add a glossy sheen.
Autumn Swirls
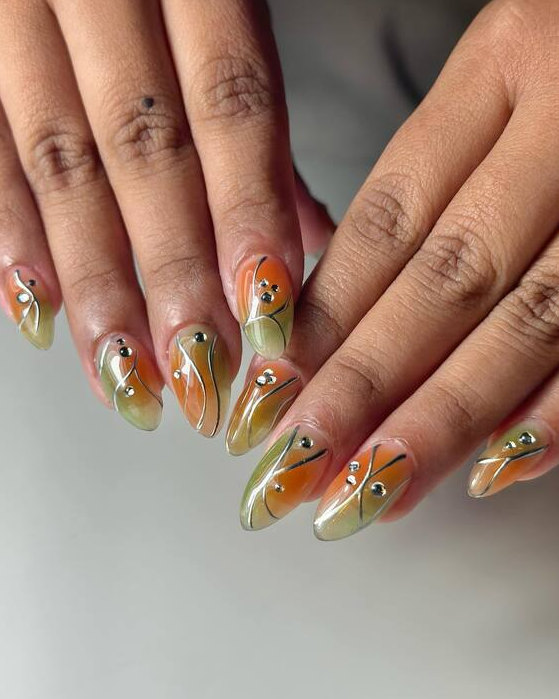
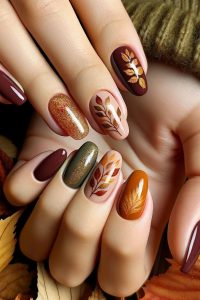
This sophisticated design features a blend of autumnal hues swirled together in a mesmerizing pattern, accented with small rhinestones for an elegant sparkle. The color palette of orange, green, and cream perfectly captures the essence of fall, making it a great choice for those who prefer subtle yet captivating nail art.
Consumables List
- Cream, orange, and green nail polishes.
- Small rhinestones for embellishment.
- Nail adhesive for securing rhinestones.
- Glassy top coat for a smooth, polished finish.
DIY Instructions
- Start by applying a cream base on all nails.
- While still wet, drop small dots of orange and green polish onto the nail.
- Use a toothpick to swirl the colors gently.
- Place a few rhinestones on the nails while the polish is tacky.
- Seal everything with a glassy top coat for durability and shine.
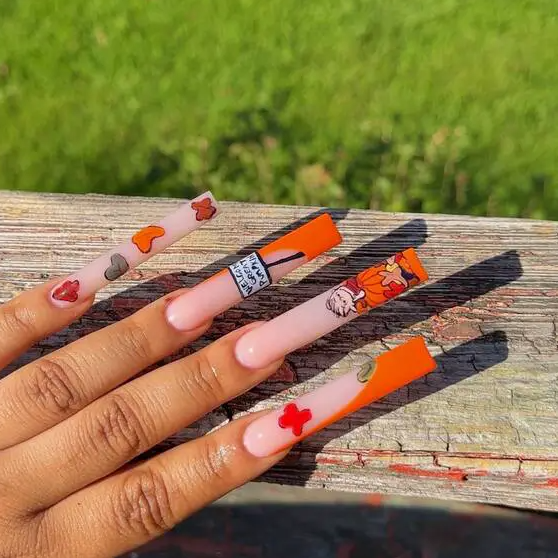
Autumnal Long Point
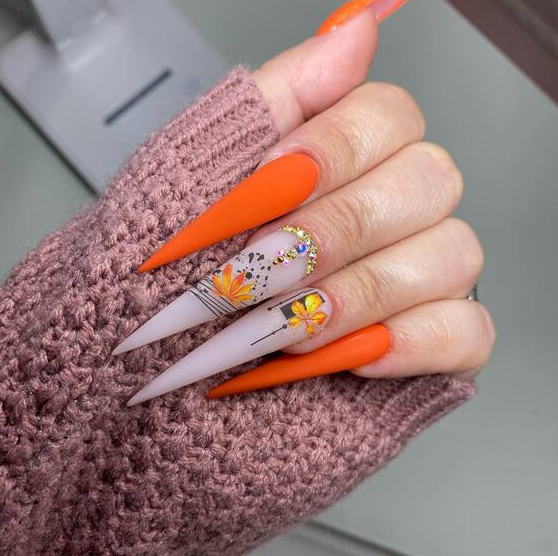
Embrace the spirit of autumn with these long, pointed nails in a vibrant orange hue, decorated with delicate floral patterns and tiny crystals. This design blends simplicity with sophistication, featuring a striking color that’s perfect for the season.
Consumables List
- Vibrant orange gel polish.
- White and yellow nail paints for floral details.
- Small crystals and a picker tool for precise placement.
- Long-lasting top coat for a durable finish.
DIY Instructions
- Apply a base of vibrant orange gel polish.
- Paint small, delicate flowers on the tips using white and yellow.
- Embellish with tiny crystals around the floral designs for added sparkle.
- Seal everything with a durable top coat to ensure longevity and shine.
Autumnal Red With Golden Accents
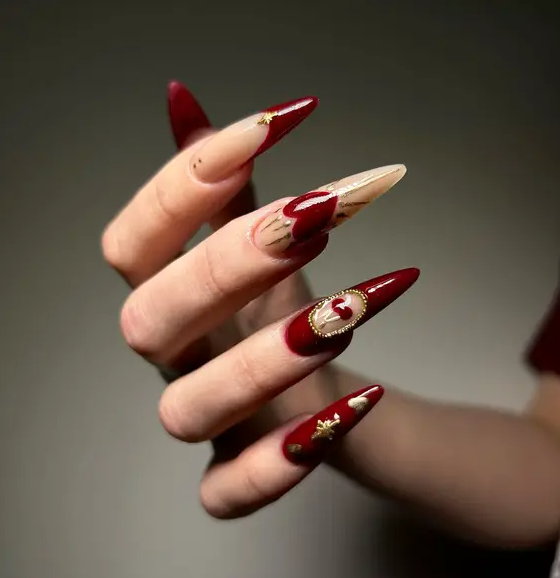
This design is a celebration of fall’s signature colors, featuring deep red with gold details that mimic the falling leaves. The almond-shaped nails provide an elegant canvas for the intricate gold leaf designs and heart motifs, which add a touch of romanticism and luxury. This manicure is perfect for those who love a bit of drama and are not afraid to showcase a bolder palette.
Consumables List
- Deep red nail polish: Essie’s “Bordeaux.”
- Gold leaf stickers or thin brush and gold polish for freehand details.
- Clear gel top coat for a lasting finish.
DIY Instructions
- Apply two coats of deep red polish as the base.
- Place gold leaf stickers or use a thin brush to paint small gold leaves and hearts.
- Finish with a clear gel top coat to ensure your design lasts through the season’s festivities.
Bold Black Elegance With A Twist
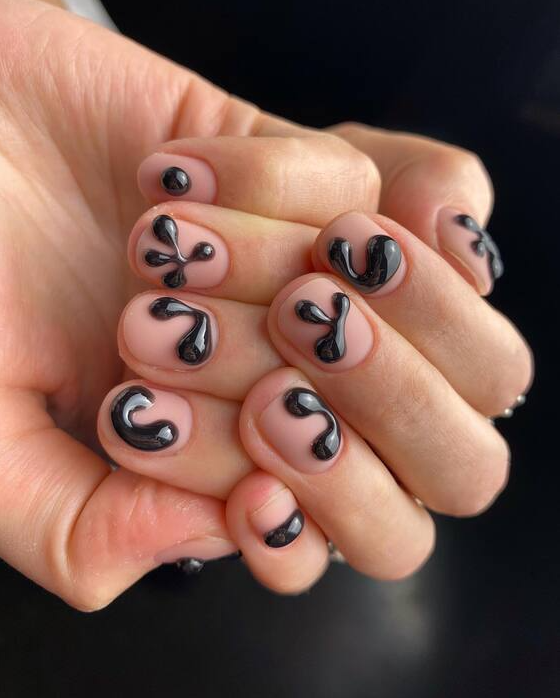
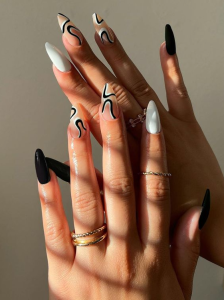
The first design captures the essence of autumn with its sophisticated blend of glossy black and delicate white accents. This manicure uses a glossy black base that speaks of elegance and mystery, perfect for evening events during the fall. The swirls and twirls in white add a playful contrast, creating a dynamic yet refined appearance. It’s a striking choice for those who appreciate a nail design that combines classic colors with a modern artistic touch.
Consumables List
- Black gel polish: Opt for a high-gloss finish like OPI’s “Black Onyx.”
- White nail art pen: Sally Hansen’s Nail Art Pens offer precision for those detailed swirls.
- Top coat: Seche Vite Dry Fast Top Coat for a durable, glossy finish.
DIY Instructions
- Start with a clean, prepped nail, applying a base coat to protect your nails.
- Apply two coats of the black gel polish, curing under a UV lamp if necessary.
- Once dry, use the white nail art pen to draw swirls on each nail. Let your creativity lead the way!
- Seal everything with a fast-drying top coat to enhance the gloss and protect your artwork.
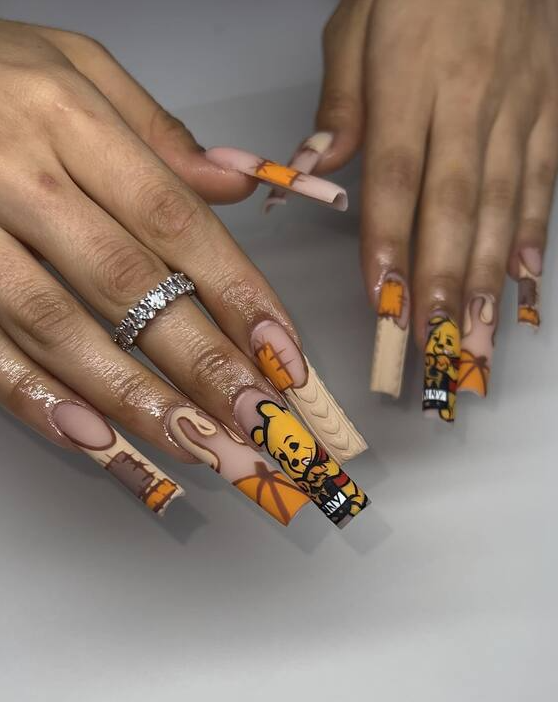
Cartoon Fun
This playful design features iconic cartoon graphics on a soft pink base, infusing a sense of nostalgia and whimsy into your nail art. With pops of vibrant orange and clever depictions, these nails are perfect for those who love to carry a piece of art at their fingertips, reflecting both creativity and a cheerful spirit.
Consumables List
- Soft pink nail polish.
- Orange nail paint for details.
- Nail decals or hand-painted art of cartoon characters.
- Matte top coat for a modern, non-glossy finish.
DIY Instructions
- Apply a soft pink polish as the base color.
- Attach nail decals or hand-paint cartoon characters and motifs using orange paint.
- Apply a matte top coat to reduce shine and give a contemporary look to the playful designs.
Chic Safari Elegance
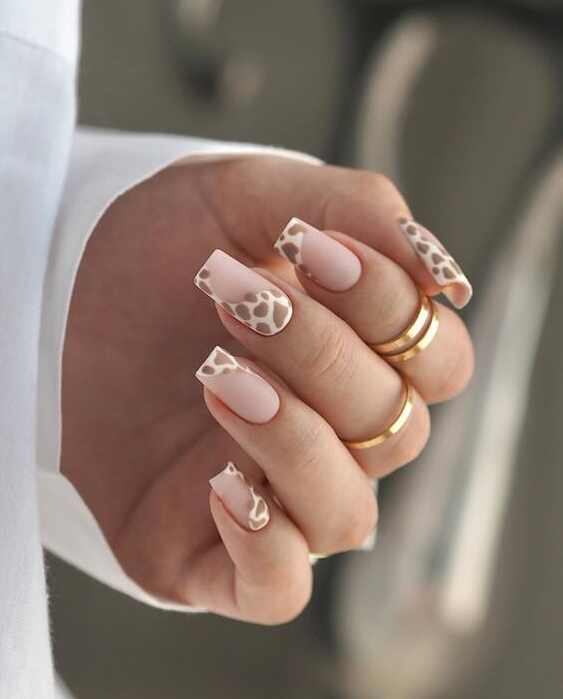
Embrace the call of the wild with this exquisite safari-inspired nail design. The translucent tips adorned with delicate giraffe spots offer a subtle nod to wildlife, blended seamlessly into a soft pink base. This design is not just a style statement; it’s an understated testament to the beauty of the animal kingdom, ideal for fall when nature’s patterns come to the forefront.
Consumables List
- Nude pink gel polish: CND Shellac “Bare Chemise.”
- Clear tip extensions.
- Brown and white nail art pens for detailed spot designs.
- High-gloss top coat for a shiny, protective finish.
DIY Instructions
- Apply a base coat of nude pink on natural nails.
- Affix clear tip extensions and ensure a smooth blend with the base.
- Using the nail art pens, draw giraffe spots on the tips. Start with brown outlines filled in with white.
- Finish with a high-gloss top coat to encapsulate the design and add durability.
Cute Critters
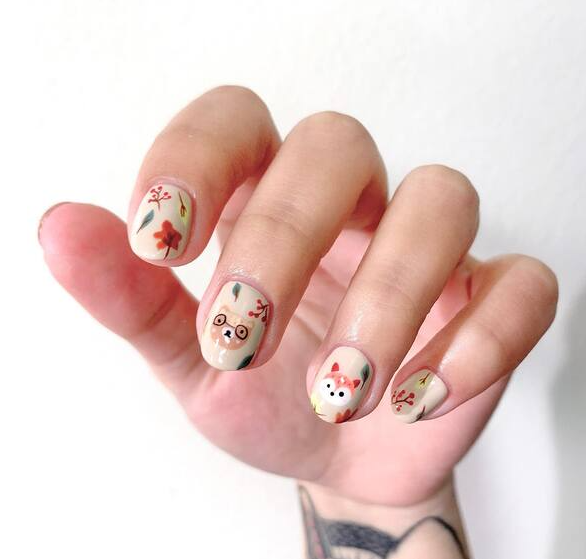
This adorable design features cute animal faces painted over a soft cream background, perfect for those who enjoy whimsical and charming nail art. Each nail showcases a different critter, bringing a playful vibe to your everyday style.
Consumables List
- Cream nail polish for the base.
- Various colors for animal details (browns, whites, pinks).
- Thin brushes for intricate detailing.
- Clear top coat to protect the designs.
DIY Instructions
- Start with a cream-colored base on all nails.
- Use thin brushes to paint different animal faces on each nail, adding unique expressions.
- Apply a clear top coat to protect the designs and add a shine that makes the details pop.
Eclectic Artistry
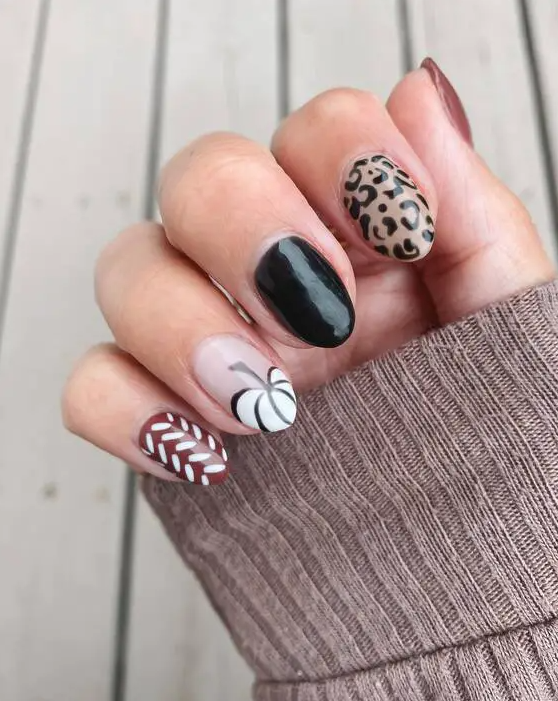
This nail design is for those who adore mixing textures and patterns. Featuring a combination of matte and glossy finishes, alongside geometric and animal prints, it reflects a playful yet sophisticated approach to nail art. The varying designs on each nail create a bespoke feel, perfect for personalizing your fall look.
Consumables List
- Matte top coat and glossy black polish.
- Nail art stickers or stencils for precise patterns.
- White and brown nail polish for additional detailing.
DIY Instructions
- Apply your base color, alternating between matte and glossy finishes on different nails.
- Use stickers or stencils to apply geometric and animal prints. Hand-paint additional details where necessary.
- Finish with a top coat on the glossy nails; leave the matte designs untouched for effect.
Eclectic Elegance

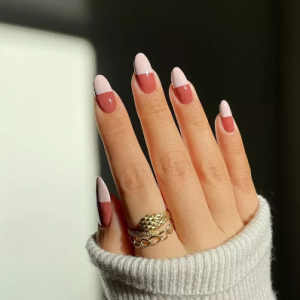
This design showcases a daring mix of patterns and colors, featuring sharp geometric shapes alongside soft pastels. Each nail tells a different story, making this style perfect for those who embrace boldness and individuality. The combination of deep blues and vibrant greens with neutrals creates a dynamic visual impact.
Consumables List
- Pastel green and peach nail polishes.
- Deep blue nail paint for contrast.
- Matte and glossy top coats to differentiate texture.
- Fine brushes and striping tape for precise patterns.
DIY Instructions
- Paint each nail with a different base color—alternating between matte and glossy finishes.
- Use striping tape to create geometric designs, applying contrasting colors for a bold effect.
- Finish with the appropriate top coat on each nail, matte or glossy, depending on the desired effect.
Floral Whimsy

This design captures the essence of fall florals with a whimsical twist. Featuring soft peachy pinks and subtle green accents, these nails mimic the autumn bloom’s last breath. Floral patterns are artistically rendered to appear as if swept by a gentle breeze, making this design perfect for those who appreciate nature’s transient beauty.
Consumables List
- Soft peach gel polish.
- Green nail polish for leafy details.
- White and pink acrylic paint for floral art.
- Matte top coat to give a natural, velvety finish.
DIY Instructions
- Paint your nails with two coats of soft peach gel polish.
- Using a fine brush, create floral and leaf designs with green, white, and pink.
- Apply a matte top coat to enhance the naturalistic feel of the design, avoiding any gloss.
Galactic Magma
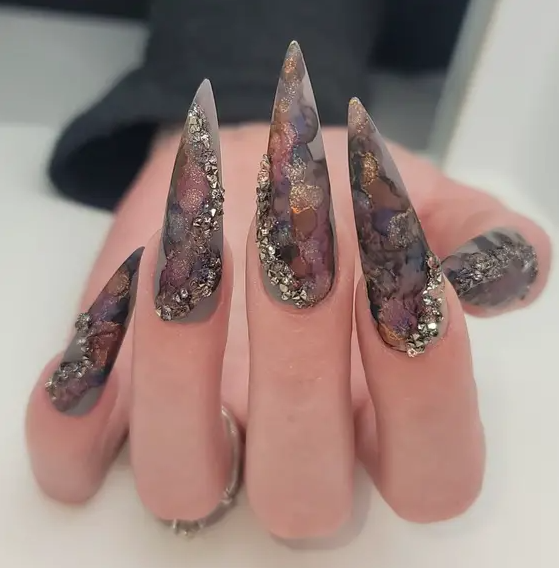
This design captures the mysterious beauty of a galactic explosion with its blend of purple and silver hues and organic, flowing patterns. Embedded with tiny gems, this look is cosmic and luxurious, ideal for those looking to bring a bit of the night sky to their fall fashion.
Consumables List
- Purple and silver metallic polishes.
- Small gems or rhinestones.
- Clear gel polish for embedding the stones.
- Fine detail brush for intricate patterns.
DIY Instructions
- Start with a purple base, adding touches of silver for a marbled effect.
- While the base is tacky, embed small gems at strategic points to mimic stars.
- Use a detail brush to enhance the cosmic feel with additional swirls or dots.
- Seal with clear gel polish, curing under UV light for durability.
Gilded Autumn Leaves
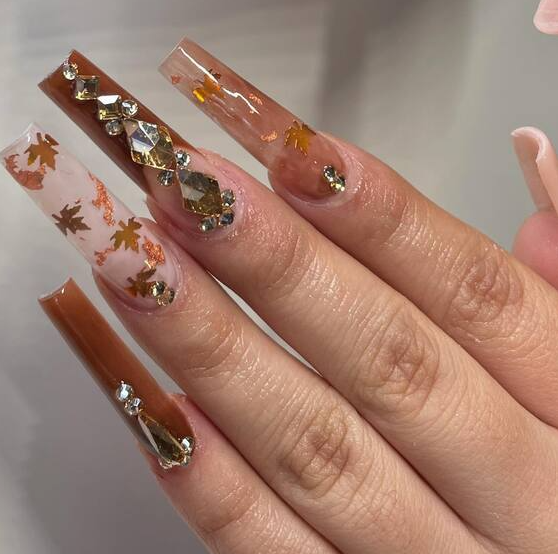
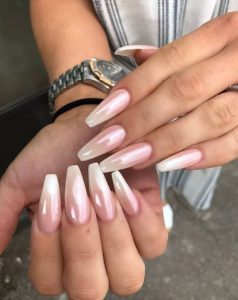
These nails beautifully capture the essence of fall with their crystal-clear tips adorned with floating golden leaves and sparkling gems. The design is a perfect blend of nature-inspired elements and glamorous detailing, making it ideal for those looking to add a touch of elegance to their seasonal look.
Consumables List
- Clear acrylic or gel for the base.
- Gold leaf pieces for embedding.
- Assorted rhinestones and gems.
- Strong-hold glue for gems.
- High-gloss top coat for a seamless finish.
DIY Instructions
- Prepare the nails with a clear base of acrylic or gel.
- Before curing or drying, embed small pieces of gold leaf and carefully place rhinestones.
- Cure under UV light or allow to dry thoroughly.
- Seal with a high-gloss top coat to protect the design and enhance the clarity of the base.
Glittering Gold Rush
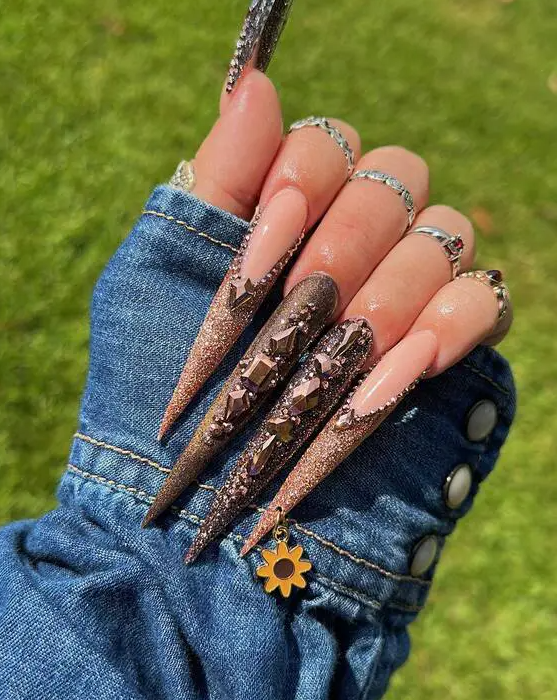
Embrace opulence with these stiletto nails featuring a cascading glitter design. Starting with a nude base, the nails are adorned with chunky gold glitter tapering down, punctuated by dramatic geometric patterns. This design is for those who love to make a bold statement and aren’t afraid to shine bright this fall.
Consumables List
- Nude base polish: Chanel Le Vernis Longwear Nail Colour in “Beige Beige.”
- Gold glitter, preferably chunky for texture.
- Black nail art liner for geometric accents.
- High-gloss top coat to enhance the sparkle.
DIY Instructions
- Paint your nails with the nude base color.
- While still tacky, sprinkle gold glitter starting from the tip and fading towards the middle.
- Use a black nail art liner to add geometric designs over the glitter on select nails.
- Apply a thick top coat to smooth out the texture and add a glossy finish.
Halloween Fright And Delight
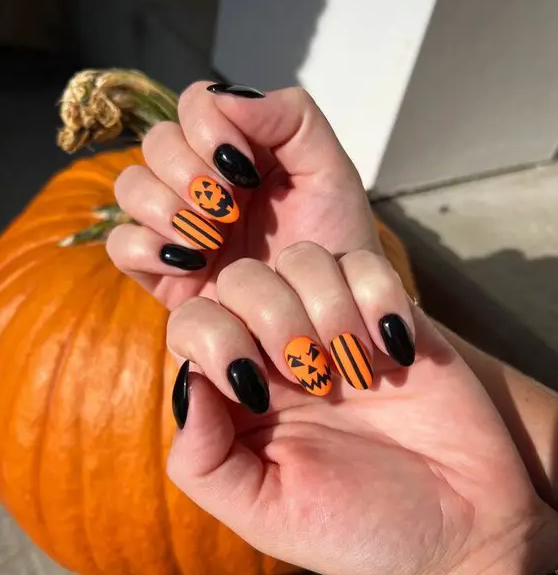
This nail design is a playful homage to Halloween, featuring stark black backgrounds with vibrant orange accents showcasing spooky pumpkins and bold stripes. It’s perfect for those who want to celebrate the season with a touch of fun and fright, combining classic Halloween colors with a chic design that stands out at any costume party.
Consumables List
- Black nail polish: OPI “Black Onyx” for a deep, glossy base.
- Orange nail polish: Essie’s “Electric Orange” for bright, eye-catching details.
- Thin nail art brush for precise stripes and pumpkin details.
- Quick-drying top coat to seal in the artwork.
DIY Instructions
- Paint your nails with two coats of black polish.
- Using a thin brush, add orange stripes and pumpkin designs on selected nails.
- Carefully outline the pumpkins and add facial features with a fine-tip black nail art pen.
- Finish with a top coat to protect your design and add shine.
Harvest Charm

This adorable manicure celebrates the essence of the harvest season with pink-toned nails featuring golden pumpkin decals. The polka dots add a playful, whimsical touch, making it a perfect option for casual fall gatherings or a day out at the pumpkin patch.
Consumables List
- Light pink nail polish: Essie’s “Muchi, Muchi.”
- Gold pumpkin nail decals.
- Black nail art pen for polka dots.
- Matte top coat for a modern finish.
DIY Instructions
- Apply two coats of light pink polish as your base.
- Place gold pumpkin decals on the nails, selecting a central position for each.
- Add black polka dots around the decals for a fun, dotted effect.
- Finish with a matte top coat to contrast the glossy decals and soften the overall look.
Liquid Gold Fusion
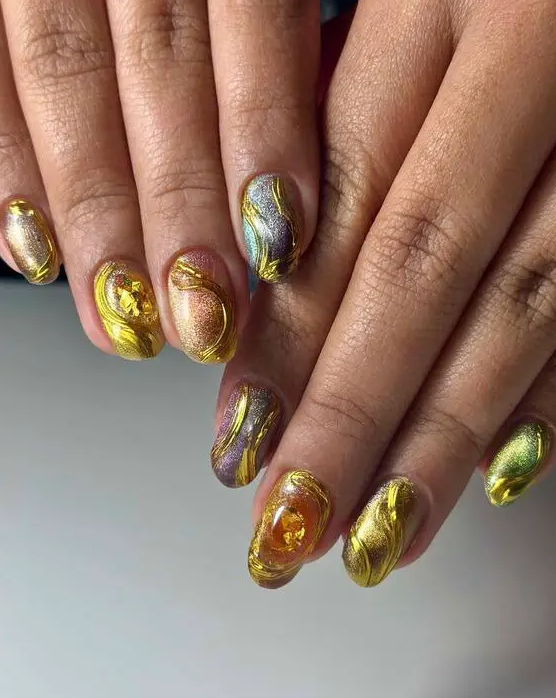
Inspired by the lustrous sheen of molten gold, this nail design features fluid metallic swirls in shades of gold, silver, and purple. The seamless blend of these colors creates a dynamic, reflective surface that catches light and adds a luxurious depth to the nails.
Consumables List
- Gold, silver, and purple metallic gel polishes.
- Mixing palette for blending colors.
- Thin brushes for swirling techniques.
- High-shine top coat for a glossy, reflective finish.
DIY Instructions
- Apply a base coat of gold gel polish.
- Mix small amounts of silver and purple on a palette and use a thin brush to swirl these colors into the gold base while still wet.
- Continue swirling until you achieve a smooth, fluid pattern.
- Finish with a high-shine top coat to enhance the metallic effect and ensure long wear.
Modern Art Strokes
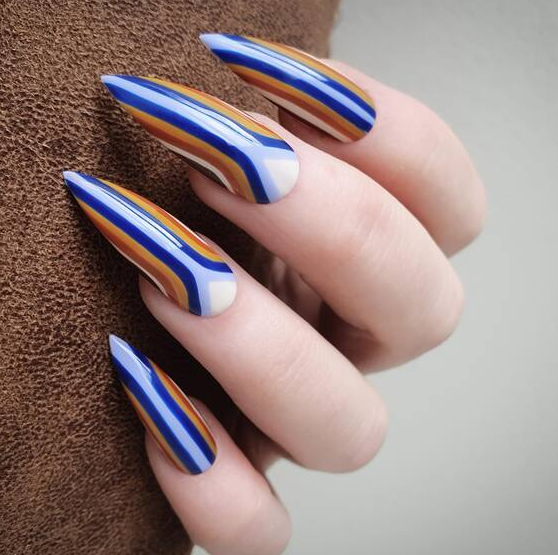
This nail design boasts sharp, clean lines and a striking color combination of blue, white, and orange, reminiscent of modern art paintings. The precise geometric patterns provide a dynamic and bold look that’s perfect for those seeking a standout manicure this fall.
Consumables List
- White nail polish as the base color.
- Blue and orange nail polishes for the stripes.
- Striping tape or stencils for clean lines.
- Glossy top coat for a sleek finish.
DIY Instructions
- Apply a white base coat and let it dry completely.
- Position striping tape to outline where the blue and orange stripes will go.
- Paint the stripes carefully, removing the tape while the polish is still wet.
- Once dry, apply a glossy top coat for a smooth, protective finish.
Playful Pumpkin Patch
This design is uniquely adorable, featuring a cartoonish pumpkin motif with playful expressions on a beige background. It’s ideal for those who love thematic nail art with a sense of humor, perfect for casual fall days or Halloween-themed events.
Consumables List
- Beige nail polish: Sally Hansen “Almost Almond.”
- Orange, black, and white nail paint for the pumpkin designs.
- Nail art pens for detailed facial expressions.
- Matte top coat for a contemporary finish.
DIY Instructions
- Apply a beige base coat to all nails.
- Paint pumpkin shapes using orange nail paint on alternating nails.
- Use nail art pens to add faces and other details to the pumpkins.
- Apply a matte top coat to reduce shine and give a modern look.
Spooky Chic
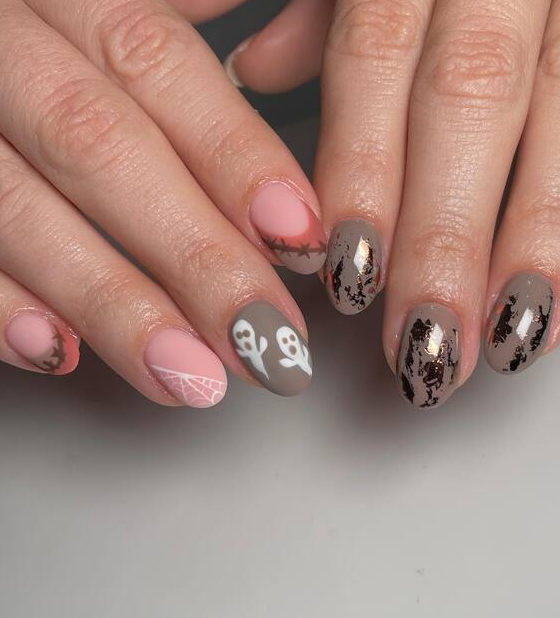
Just in time for the Halloween season, this design blends the eerie with the elegant. A soft grey base pairs with haunting motifs including spider webs and ghostly figures, while gold flake accents give a surprisingly luxe twist. It’s the perfect manicure for those who want to dip their nails into the Halloween spirit without going overboard.
Consumables List
- Soft grey nail polish: Try Essie’s “Mooning.”
- White nail art pen for detailed ghost and web designs.
- Gold leaf flakes for a touch of glam.
- Quick-dry top coat to seal in the design.
DIY Instructions
- Apply two coats of soft grey polish as your base.
- Use a white nail art pen to draw delicate spider webs and ghost figures on alternate nails.
- Add gold leaf flakes to a few nails for a mixed finish.
- Seal the design with a top coat for durability and shine.
Sunset Blooms
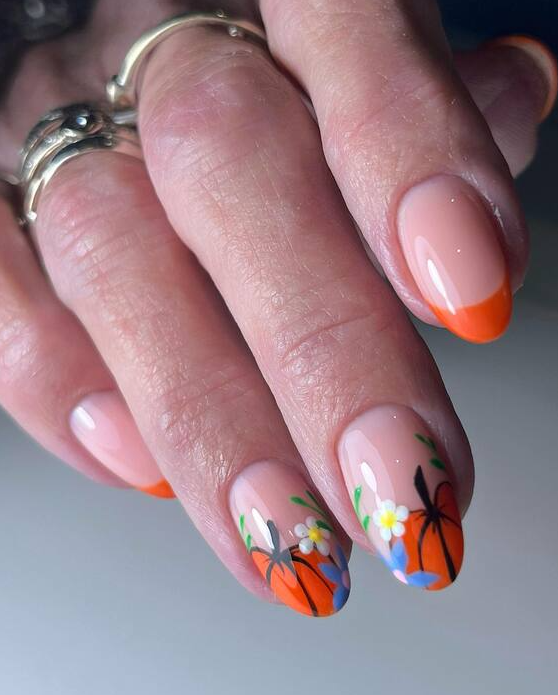
Reflecting the vibrant colors of a fall sunset, this design combines floral motifs with bold orange tips. The intricate flowers are painted over a subtle gradient, creating a dynamic and colorful display that’s both eye-catching and stylish.
Consumables List
- Nude and orange nail polishes for the base and tips.
- Multi-colored nail paints for floral designs.
- Fine brushes for detailed painting.
- Quick-dry top coat to protect and seal the paint.
DIY Instructions
- Start with a nude base coat.
- Create a gradient effect by blending orange polish at the tips.
- Hand-paint small flowers along the gradient interface using various colors.
- Finish with a top coat to enhance the durability and shine of your nail art.
As we wrap up our exploration of Fall Nail Designs 2024, we’ve delved into a rich tapestry of styles that blend boldness, elegance, and whimsy to elevate your nail art game. From the understated charm of gilded autumn leaves to the vibrant playfulness of cartoon-inspired graphics and the sophisticated allure of modern art strokes, each design offers a unique way to express personal style through the art of manicure. Whether you’re looking to make a statement with sharp geometric patterns or embrace the season with festive, themed art, these trends provide ample inspiration to carry you through autumn with style, creativity, and a touch of seasonal flair.